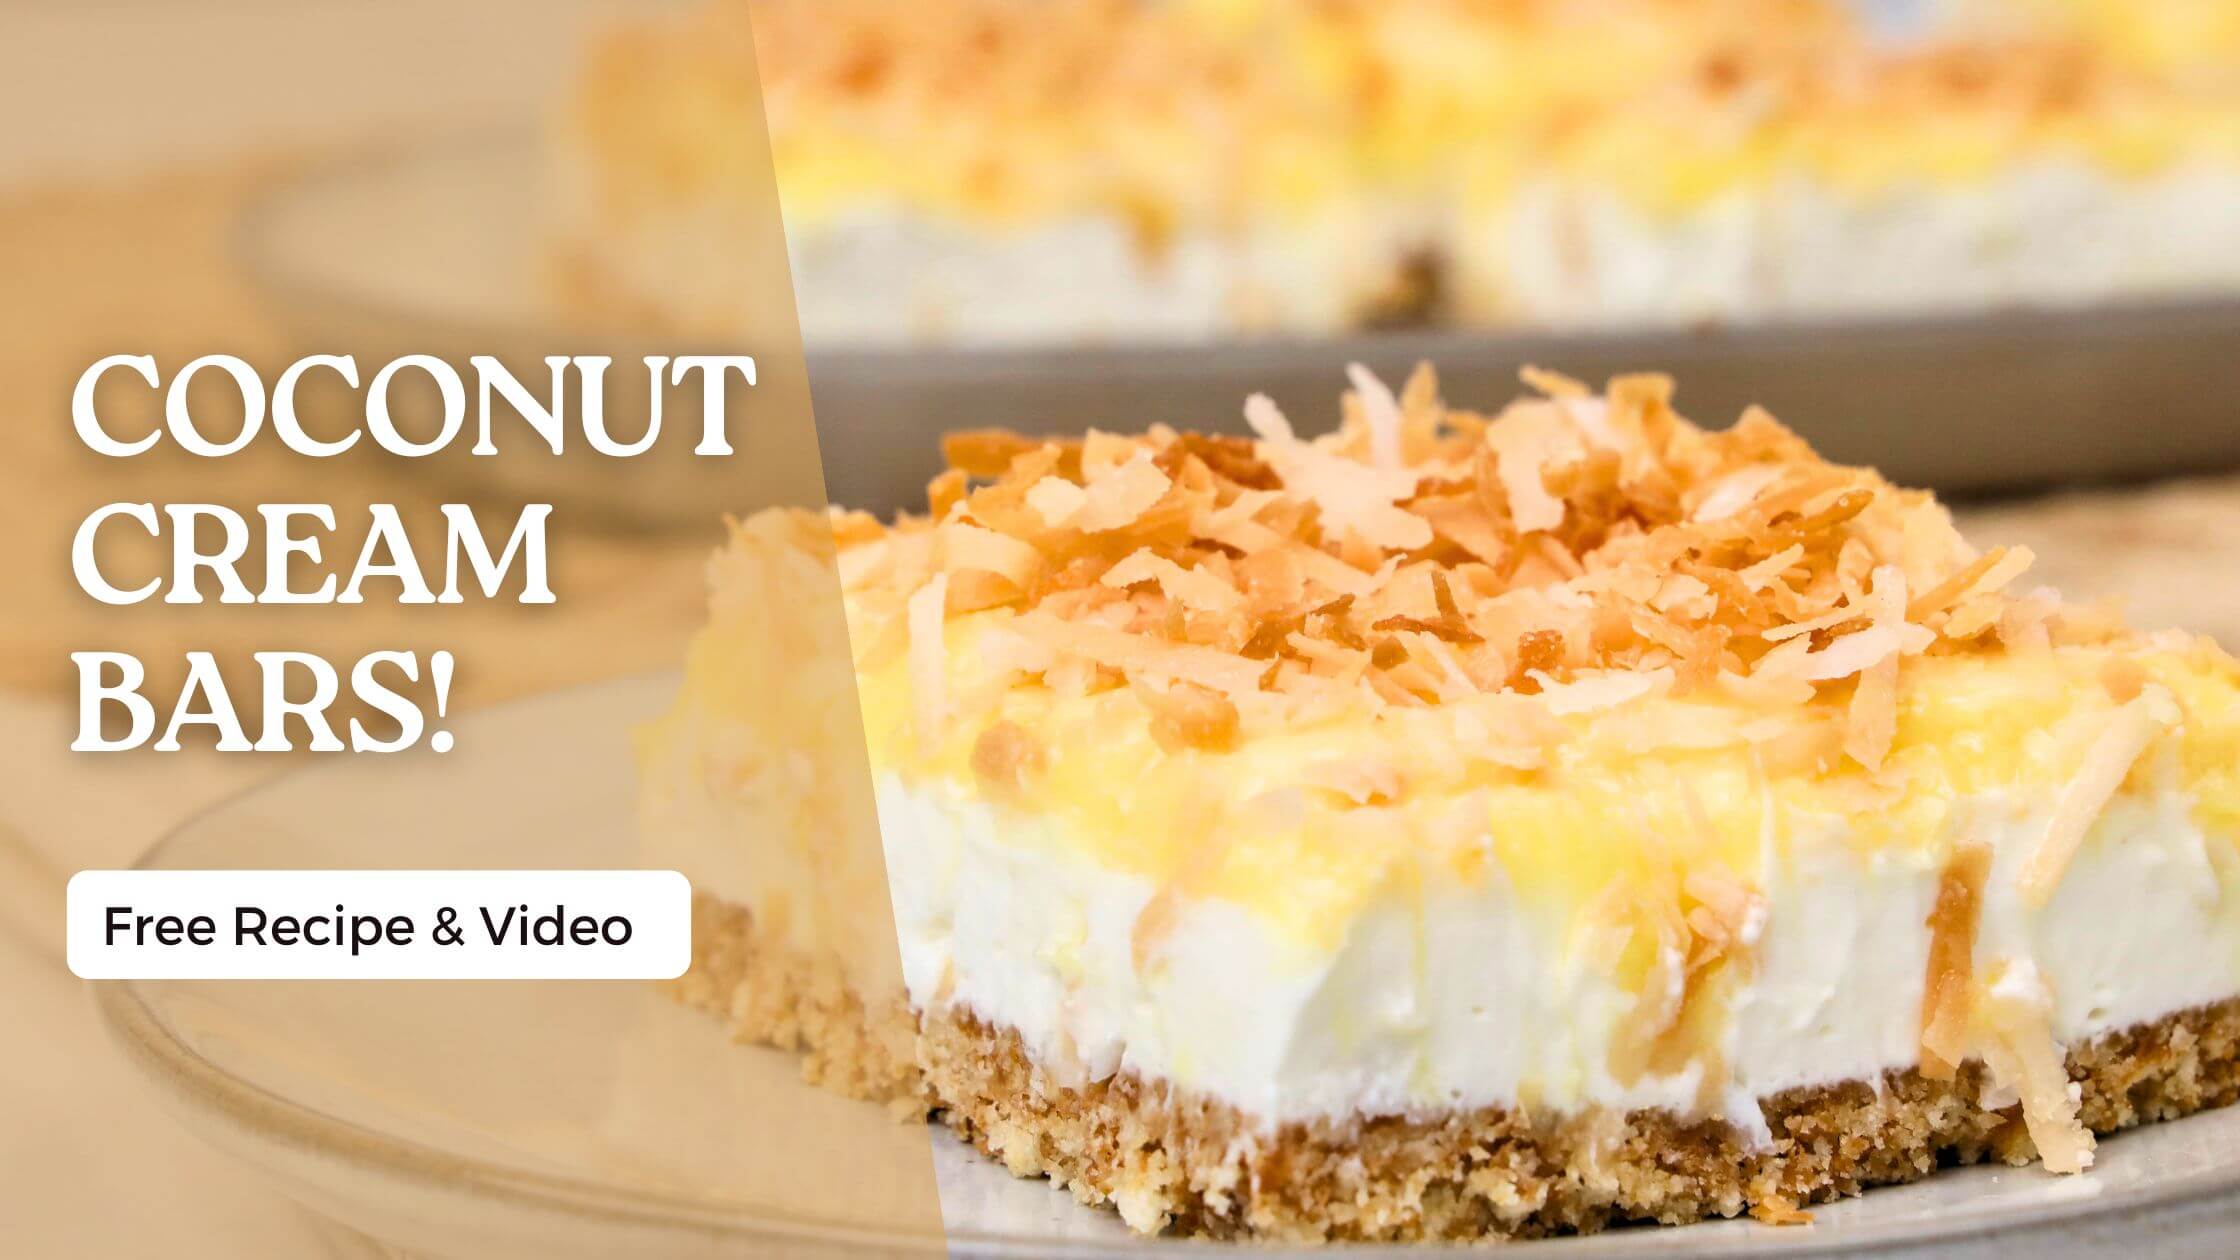
Coconut Cream Bars: Your New Favorite No-Bake Dessert
If you're a fan of tropical flavors and easy desserts, then coconut cream bars are about to become your new favorite treat. Imagine a rich, creamy filling with a crunchy crust, all topped off with toasted coconut flakes for an added layer of texture and flavor. These bars are not only delicious but also super easy to make, with no baking required. Perfect for summer gatherings, potlucks, or just a sweet treat to have at home, coconut cream bars are sure to impress.
Ingredients for Coconut Cream Bars
Before diving into the recipe, let's gather all the necessary ingredients to ensure a smooth baking experience.
For the Crust:
- 3-4 cups graham cracker crumbs
- 1/2 cup unsalted butter, melted
For the Cream Cheese Filling:
- 1 package cream cheese, softened
- 1 cup sugar
- 1 tub (8 oz) cool whipped topping, thawed
- 1/2 cup sweetened coconut flakes
For the Coconut Layer:
- 1 box coconut cream pudding mix
- 2 cups milk (we used whole)
- 1 cup toasted coconut flakes
For the Topping:
- 1 cup sweetened flaked coconut, toasted
- Extra whipped topping for garnish (optional)
Step-by-Step Instructions
Now that you have all your ingredients ready, let's dive into the step-by-step process of making these delightful coconut cream bars.
Step 1: Prepare the Crust
Make The Crust: In a food processor, crush the Nilla Wafers until fine (with some chunks visible, because we'll crush them again). Add your melted butter and crush them again in the food processor until all pieces are fine.
Press into Pan: Press that mixture firmly into the bottom of a PRE-GREASED 9x13-inch baking dish to form an even layer. Use the back of a measuring cup to ensure the crust is compact. Place the crust in the refrigerator to chill while you prepare the filling.
Step 2: Make the Filling
Beat the Cream Cheese: In a large mixing bowl, beat the softened cream cheese and sugar until it is smooth and creamy.
Fold in Whipped Topping: Then in that same bowl, gently fold in the thawed whipped topping and coconut flakes until the mixture is incorporated. Once it's done, grab your Nilla Crust pan and then spread the cream cheese / whipped mixture evenly across the Nilla wafter crust.
Prepare the Coconut Pudding Layer: In a separate bowl, whisk together the instant coconut cream pudding mix and whole milk for about 2 minutes until the pudding thickens. Then fill a large piping bag with the pudding and pipe that layer on top of the cream cheese layer.
Chill in Refrigerator: Once both layers are done, place in the fridge while you work on the toasted coconut topping.
Tipless Piping Bags (S or M)

$5.00
AWESOME PIPING BAGS ARE HERE! THIS LISTING IS FOR ONE SET OF 100 PIPING BAGS IN SMALL OR MEDIUM SIZE. PERFECT BAGS FOR ICING YOUR COOKIES OR CAKES! WHAT SETS OUR PIPING BAGS APART OF THE THICKNESS. IT'S THICK ENOUGH TO… read more
Step 3: Top and Chill
Toast the Coconut: Preheat your oven to 350°F (175°C). Spread the sweetened flaked coconut on a baking sheet and toast it in the oven for about 5-7 minutes, stirring occasionally, until golden brown. Keep an eye on it to prevent burning. Allow the toasted coconut to cool.
Add the Topping: Sprinkle the toasted coconut evenly over the top of the filling.
Chill the Bars: Place the pan in the refrigerator for at least 3-4 hours (we did overnight), or until fully set. This chilling time allows the flavors to meld together and makes the bars easier to cut.
Step 4: Serve and Enjoy
Cut into Bars: Once the bars have chilled and set, use a sharp knife to cut them into squares or rectangles.
Garnish and Serve: Serve the bars chilled, garnished with extra whipped topping if desired. Enjoy the creamy, tropical goodness of these coconut cream bars!
Tips and Tricks for Perfect Coconut Cream Bars
Use Quality Ingredients
Using high-quality ingredients, especially for the cream cheese and whipped topping, can make a big difference in the taste and texture of your coconut cream bars. Opt for full-fat versions for the best results.
Chill for Clean Cuts
Allowing the bars to chill thoroughly will make them easier to cut into clean, sharp squares. A hot, dry knife will also help you achieve cleaner cuts.
Customize Your Bars
Feel free to get creative with your coconut cream bars. You can add a layer of crushed pineapple to the filling for an extra tropical twist, or drizzle melted chocolate over the top for a richer flavor.
Storage
Store any leftover bars in an airtight container in the refrigerator for up to five days. You can also freeze the bars for up to a month. Thaw them in the refrigerator overnight before serving.
Why Coconut Cream Bars Are a Hit
Coconut cream bars are a hit for several reasons. The combination of the crunchy Nilla Wafter crust, creamy coconut filling, and toasted coconut topping creates a perfect balance of textures and flavors. These bars are also incredibly easy to make, requiring no baking, which makes them a convenient dessert option. Plus, they’re versatile enough to be served at a variety of occasions, from casual family gatherings to more formal events.
Conclusion
Making coconut cream bars is a fun and rewarding experience. With their rich, creamy filling and crunchy toasted coconut topping, these bars are sure to be a hit wherever you serve them. Whether you're a seasoned baker or just getting started, this recipe is straightforward and results in a delicious dessert that everyone will love.
The simplicity and richness of this dessert will make it a staple in your repertoire. A perfect treat for all the summer gatherings, but we plan to bring this to Thanksgiving, too! A much easier recipe than coconut cream pie!
Enjoy creating and sharing these delightful bars with your loved ones, adding a tropical twist to your sweet treats.
So gather your ingredients, get your mixing bowls ready, and dive into the delightful world of coconut cream bars. Your taste buds will thank you! Happy baking!
THANK YOU!
We appreciate your support so much and hope you enjoyed this video!
Be sure to follow along our journey!